First of all, bread is the temptation of a celiac's existence. Not only is gluten free bread expensive, but it tastes like cardboard soaked in metal shavings. Can I get an amen?! My kids like one brand of bread and that happens to be Udi's. It's $5 a loaf and will last a day at our house. The loaves are dreadfully small. It's ok bread. But really, gone are the days of $1 loaves of spongy bread for teenagers to consume in large quantities and make bread balls out of. It's just not happening! Also gone are the days of hot french bread at the local grocer that my kids would slather in butter and fight over the ends. And gone are the bread baking days. I was such a good baker. Really, I am not tooting my own horn, I really was. I had it down to a weekly occurance and my children worshipped the smell that came out of the kitchen, clamoring for the honey and butter for a hearty slice. What is a girl to do? In comes my fabulous step-mother, the master kitchen chef that she is. She is not afraid to embark on gluten free baking. And although she is gluten free by choice, she is diligent about it. While I spent a much needed break from my life at the beach with her and my father, I got to sample some of the goodness that her creativity produces. So here is the french bread recipe that actually tastes like real bread! It's pretty much will blow any other gluten free bread out of the water. And the best part, it's egg free, sugar free (as long as you use honey instead), dairy free, and nut free. Enjoy!!
First, you need to mix a high protein flour blend together:
1 1/4 cups bean flour (I use chickpea flour....and really, I just buy the dried chickpeas at WinCo for .80 cents a pound and grind my own in my blendtec blender) You can also use soy if your diet allows it (me, I steer clear of soy because of it's estrogen like qualities).
1 cup cornstarch or potato starch (I used potato starch...NOT potato flour)
1 cup tapioca starch (this stuff is cheap if you buy it at an asian store instead)
1 cup white or brown rice flour (again, you could grind your own if you have a great blender. I used brown)
I sifted this mixture together and made a double batch so I could have some for later. You will have left over flour if you use the following recipe for french bread.
French Bread
3 cups gluten free high-protein flour blend
2 teaspoons xanthan gum
1 teaspoon salt
2 tablespoons sugar (or honey)
1 tablespoon active dry yeast
1 tablespoon olive oil
1 1/2 cups warm water (120 degrees)
rice or cornmeal for dusting
1. Grease french loaf pan (or small loaf pan or muffin tin if you want dinner rolls) and dust with rice flour (or cornmeal).
2. Sift or whisk first four ingredients together and then add yeast (and herbs if you desire).
3. Add water and olive oil to the dry ingredients and mix on high for four minutes in an electric mixer.(If you are using honey, dissolve it in the water before adding).
4. Spoon dough (that's right folks...you do not knead gluten free bread) into prepared pans, cover and let rise for 45 minutes in a warm spot.
5. Preheat oven to 400 degrees.
6. Bake bread for 30 minutes on lower rack and then check to see if it is the desired color. Tent with foil if necessary. It should be done in 10 minutes. (It should sound hollow and if your really fancy you can pull out the thermometer and see if it's reached 200 degrees). If you are making rolls, they will be done in 20 minutes.
7. Let it cool for a minute...the crust is crunchy and the middle is light and chewy...knock yourself out peeps!

My journey into what to feed a family of 7 with Celiac Disease and several other food intolerances
Wednesday, January 11, 2012
Friday, March 11, 2011
Chocoholic Brownies...Gluten Free!
Sometimes it sucks to be me. I wish I could trade intestinal tract with "healthy" people. If I want something special, I have to make it myself. And if I get desperate and try my hand at the sweets offered for the gluten free crowd, I am paying $8 for 4 cookies.
What is a girl to do? Well I tried my hand at gluten free baking for realls... Brownies. Thick, rich, fudgy brownies that didn't come in a tiny container with a shocking price tag. These are not from the box variety either. I hesitate to give you the recipe because I should really copyright it first. But in the spirit of giving all my talents over to building up the gluten free community, (we get precious little that is absolutely divine anyhow), I give you the worlds best brownie recipe.
This is not a fluffy lightweight so beware...you will gain weight if you make these more than once a month.
2 cups of sugar
1/2 cup almond flour (not meal)
1/2 cup brown rice flour
1 cup Hersheys baking cocoa
1 cup butter softened ( you could use vegan shortening here if you are dairy free)
4 eggs
1 tsp vanilla
1 cup chocolate chips (they sell vegan chips as well)
2/3 cup chopped pecans
1 large pinch of kosher salt
 Now take that butter and beat it until creamy and add the eggs one at a time until incorporated. Add vanilla. Mix all the dry ingredients together (run them through a sifter if necessary...I do because I hate lumps). Add 1/3 of dry mixture to butter until incorporated. Add the remaining 2/3 and mix until smooth (I use a stand mixer so this step takes about 30 seconds.) Then add your chocolate chips and pecans. Line a 9X13 pan with parchment paper and pour (I mean plop...it really doesn't pour)into pan. Bake at 350 for 45 minutes. Let it sit a few minutes unless you want melted chocolate chip burning the roof of your mouth off. It's hard to resist, but I know you can do it. After about 15 minutes all you have to do is pull up on the parchment paper to retrieve your perfect brownies. I recommend cutting these babies after they have cooled completely because they are one hot mess if not. Of course, I dug right in just to see if they had that gross metallic taste that so many gluten free baked items have....I think I had a tungasm right then and there! I impatiently waited for this rectangle of heaven to cool and then I sliced me some love with a serrated knife. These brownies are chock full of calories. And to tell you the truth, not one person will even know that these are gluten free. They are soooooo amazing! I can honestly say, that this recipe is all my own creation. It's a mix of my Grandma's recipe, a Christmas jar mix recipe and a little inspiration thrown in for good measure. I finally don't feel like a freak! Yippee!!!
What is a girl to do? Well I tried my hand at gluten free baking for realls... Brownies. Thick, rich, fudgy brownies that didn't come in a tiny container with a shocking price tag. These are not from the box variety either. I hesitate to give you the recipe because I should really copyright it first. But in the spirit of giving all my talents over to building up the gluten free community, (we get precious little that is absolutely divine anyhow), I give you the worlds best brownie recipe.
This is not a fluffy lightweight so beware...you will gain weight if you make these more than once a month.
2 cups of sugar
1/2 cup almond flour (not meal)
1/2 cup brown rice flour
1 cup Hersheys baking cocoa
1 cup butter softened ( you could use vegan shortening here if you are dairy free)
4 eggs
1 tsp vanilla
1 cup chocolate chips (they sell vegan chips as well)
2/3 cup chopped pecans
1 large pinch of kosher salt

Monday, December 27, 2010
Chips...that I can actually eat!
Beets are extremely good for you. Not only are they a great vegetable to cleanse the liver but they help with anemia. Both these things are important for me. And right now I am getting an Organics to you box so in an effort to eat the whole box every week, I must use the vegetables provided. This week, there was a large amount of beets. My husband said he will not eat them and the rest of my kids are scared to. So determined to turn this into something everyone would eat, I focused on a preparation that seemed more like snack food. The coleslaw and smoothie recipes were fine, but still too beety for my family. So I gave this one a try and I have got to say that everyone ate them! Of course I had the biggest portion, but they were consumed and we will definitely make them again.
First, slice your beets as thin as possible. I have a mandolin for this and did 1/16th of an inch. The recipe calls for 1/8th of an inch, but I am all about saving time, so the thinner the better for me. Pat them dry or lay them out on paper towels to absorb the moisture.


First, slice your beets as thin as possible. I have a mandolin for this and did 1/16th of an inch. The recipe calls for 1/8th of an inch, but I am all about saving time, so the thinner the better for me. Pat them dry or lay them out on paper towels to absorb the moisture.

Fry them in oil that is 350 degrees. It should only take a minute because as soon as the edges start to curl, your chips are almost done. Take out with a slotted spoon and place on paper towels. (note: we don't buy paper towels but we happened to get some as a gag gift for Christmas..funny!)

Here is your finished product! I sprinkled the still hot chips with a mixture of kosher salt, rosemary, and garlic. They are sweet and crunchy so try them sometime.

GlutenFree, SugarFree Crust
I am attempting to cut sugar out of our family after a huge stomach fiasco happened from Halloween to well past Thanksgiving. I wasn't exposed to any gluten, but still got super sick. So I decided to fast for 6 days and I felt great! Now, I am not eating any grains or refined sugar. So this crust I used for a blueberry tart. Since I now cook like an Italian Momma, I really don't know exact amounts on much but I will do my best to help you...
2 cups of hazelnuts
1/4 cup of honey
1/4 cup of butter
1/2 tsp of salt
 Melt honey and butter together and add salt. Place hazelnuts in a food processor and pulse until ground into a consistency of coffee grounds or course breadcrumbs. Err on the side of too big unless you want to make hazelnut butter :) Place the processed hazelnuts in a bowl and pour the honey mixture over the nuts. Combine and press into pie pan. This recipe works well for anything that you would use a graham cracker crust for. I also used a piece of saran wrap on my hands to press it down. It can be a tad sticky with the honey in it. It works well in a springform pan. I roasted the crust in a 350 degree oven for 10 minutes before putting my filling in. Let me just say, that I could eat this crust as is it's that good!
2 cups of hazelnuts
1/4 cup of honey
1/4 cup of butter
1/2 tsp of salt

Sunday, November 28, 2010
Punkin Pie Please!
Gluten free Thanksgiving....hard to accomplish? Well, yes and no. I took recipes from Epicurious and America's Test Kitchen and just modified. So here is what we did for our Stuffing:
2 Bob's Red Mill cornbread mixes made according to instructions (we used rice milk)
5 stalks of celery
2 large onions finely chopped
4 cloves of garlic
1 cup of chopped pecans
2 large apples, chopped
1 heaping teaspoon of sage
1 heaping teaspoon of thyme
1 heaping teaspoon of parsley
1 pound of gluten free sausage (we used the kind from Costco and just removed the casing)
3 15 oz cans of chicken broth
3 large eggs
1 teaspoon of salt
pepper to taste
After making the cornbread according to package directions, cut cornbread in half like a cake that you would frost. Let it dry overnight.
Cube cornbread in the morning and dry further in the oven at 250 for an hour.
Saute sausage in a large pan. Transfer sausage to a large bowl and use drippings to saute the celery, onion, and garlic until they are turning translucent. This usually takes about 10 min. I added a couple of tablespoons of butter at this point. The original recipe calls for a cup of oil or butter...and that was not going to happen! Add herbs and remove from heat.
Now in a HUGE bowl, place cubed cornbread, pecans, sausage, and vegetable mixture. In a small bowl, whisk the eggs and broth together. I used the low sodium broth and did end up adding the additional teaspoon of salt. Now pour the liquid over the cornbread cubes. Combine well and place into 2 9X13 pans. I had a large 11X14 and still filled 2 sheets of Muffin cups with the rest. (isn't that a great idea for stuffing?! My husband loves crispy, not soggy stuffing, so if you like it this way, it's all about edges...the more stuffing has contact with the pan, the crispier it gets)

Place stuffing in a 350 degree oven for 20 minutes covered in foil. Then remove foil and cook another 25 mins. The muffin tins don't take nearly as long, 25 to 30 minutes tops.
Now for Pumpkin Pie....
Bobs Red Mill Shortbread Cookie Mix
2 cups of pumpkin puree
1 tablespoon pumpkin pie spice
1 heaping teaspoon of ginger
1 1/3 cup of light coconut milk in a can
1 cup packed dark brown sugar
4 eggs

Make a Bobs Red Mill Shortbread Cookie Mix according to package directions. Divide dough in half. Press shortbread dough into a greased pie tin. Cook crust for 15-20 minutes until it is set.
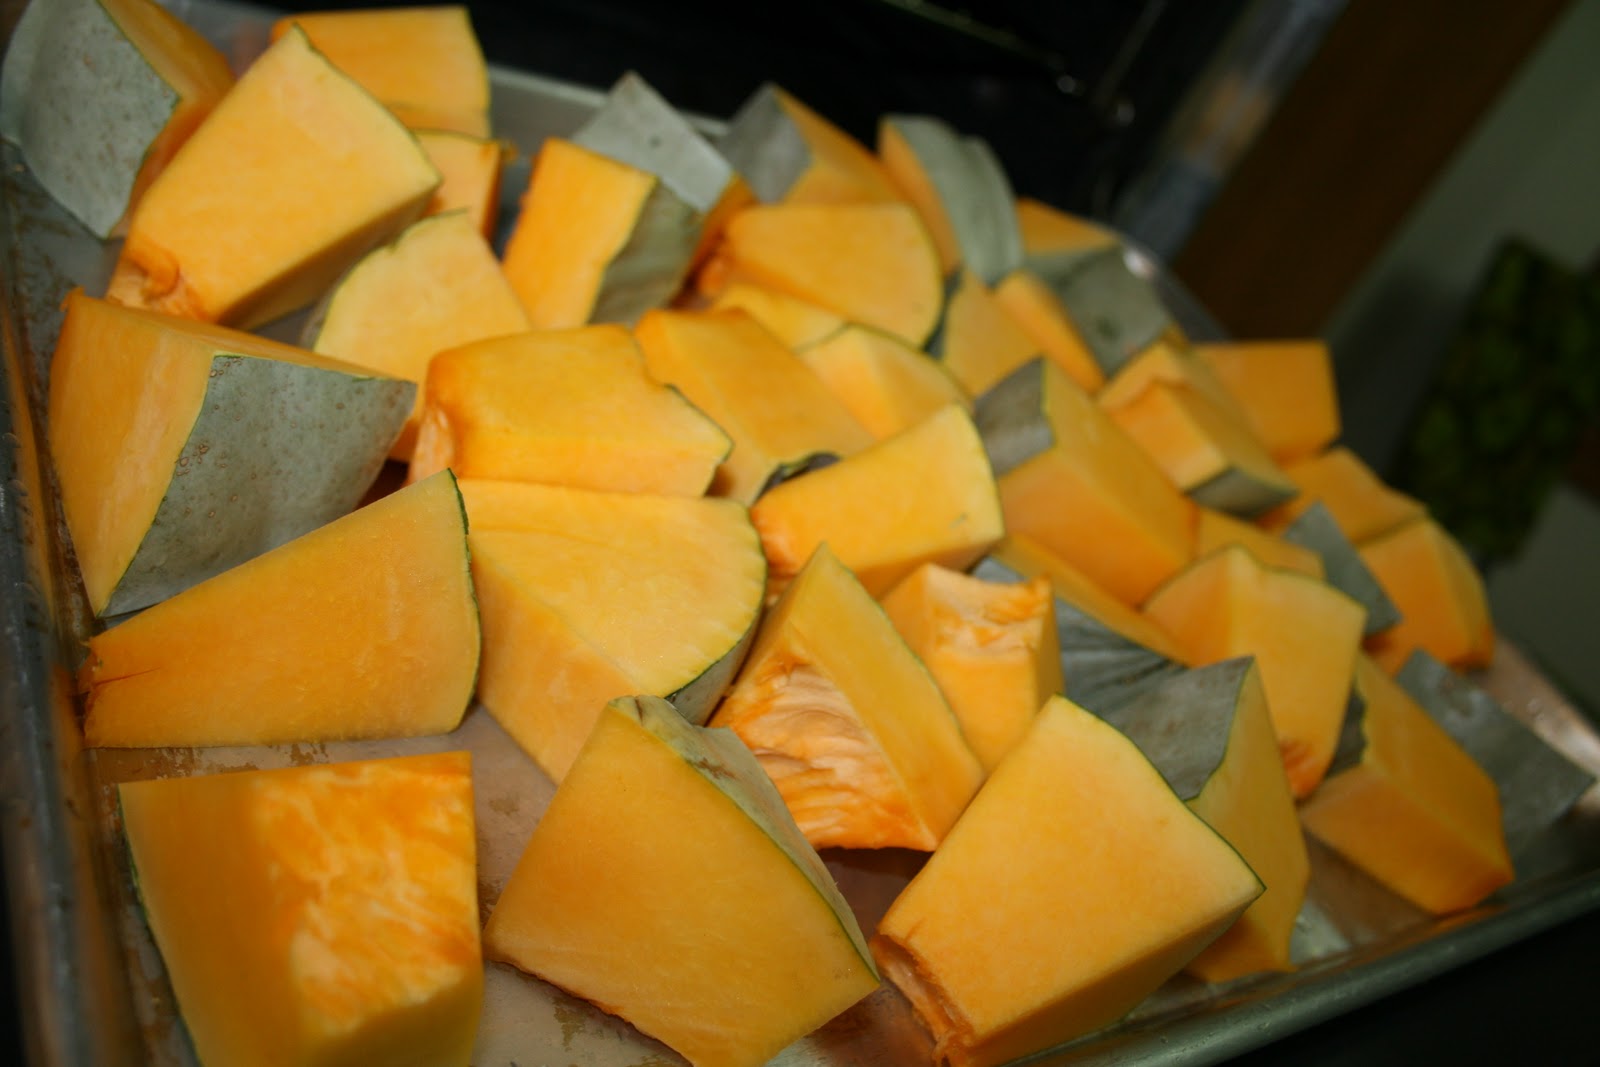
Meanwhile, combine the puree, sugar, spice, milk and eggs. Mix well. Pour mixture into hot pie crust. I used a large pie plate from pampered chef (the stone one) and it took longer than the 25-35 minutes to cook. I would recommend more like 40-50 minutes in a 400 degree oven. It turned out fabulously! The shortbread wasn't too sweet, the pie was spicy and didn't taste at all like coconut. Of course my secret ingredient is the fact that I roasted my own squash and pureed it in a food processor the day before. If you are brave enough to attempt this (it takes a while...just warning you) buy a sweet meat squash. The skin is a pale greenish blue and it is a super dense squash. It's more like a cross between a butternut and a pumpkin. Hope you enjoy!
2 Bob's Red Mill cornbread mixes made according to instructions (we used rice milk)
5 stalks of celery
2 large onions finely chopped
4 cloves of garlic
1 cup of chopped pecans
2 large apples, chopped
1 heaping teaspoon of sage
1 heaping teaspoon of thyme
1 heaping teaspoon of parsley
1 pound of gluten free sausage (we used the kind from Costco and just removed the casing)
3 15 oz cans of chicken broth
3 large eggs
1 teaspoon of salt
pepper to taste
After making the cornbread according to package directions, cut cornbread in half like a cake that you would frost. Let it dry overnight.
Cube cornbread in the morning and dry further in the oven at 250 for an hour.
Saute sausage in a large pan. Transfer sausage to a large bowl and use drippings to saute the celery, onion, and garlic until they are turning translucent. This usually takes about 10 min. I added a couple of tablespoons of butter at this point. The original recipe calls for a cup of oil or butter...and that was not going to happen! Add herbs and remove from heat.
Now in a HUGE bowl, place cubed cornbread, pecans, sausage, and vegetable mixture. In a small bowl, whisk the eggs and broth together. I used the low sodium broth and did end up adding the additional teaspoon of salt. Now pour the liquid over the cornbread cubes. Combine well and place into 2 9X13 pans. I had a large 11X14 and still filled 2 sheets of Muffin cups with the rest. (isn't that a great idea for stuffing?! My husband loves crispy, not soggy stuffing, so if you like it this way, it's all about edges...the more stuffing has contact with the pan, the crispier it gets)

Place stuffing in a 350 degree oven for 20 minutes covered in foil. Then remove foil and cook another 25 mins. The muffin tins don't take nearly as long, 25 to 30 minutes tops.
Now for Pumpkin Pie....
Bobs Red Mill Shortbread Cookie Mix
2 cups of pumpkin puree
1 tablespoon pumpkin pie spice
1 heaping teaspoon of ginger
1 1/3 cup of light coconut milk in a can
1 cup packed dark brown sugar
4 eggs
Make a Bobs Red Mill Shortbread Cookie Mix according to package directions. Divide dough in half. Press shortbread dough into a greased pie tin. Cook crust for 15-20 minutes until it is set.
Meanwhile, combine the puree, sugar, spice, milk and eggs. Mix well. Pour mixture into hot pie crust. I used a large pie plate from pampered chef (the stone one) and it took longer than the 25-35 minutes to cook. I would recommend more like 40-50 minutes in a 400 degree oven. It turned out fabulously! The shortbread wasn't too sweet, the pie was spicy and didn't taste at all like coconut. Of course my secret ingredient is the fact that I roasted my own squash and pureed it in a food processor the day before. If you are brave enough to attempt this (it takes a while...just warning you) buy a sweet meat squash. The skin is a pale greenish blue and it is a super dense squash. It's more like a cross between a butternut and a pumpkin. Hope you enjoy!
Monday, October 11, 2010
Kid Approved Granola bars
I was a great lover of a chewy granola bar now and then when I was not a Celiac. The rich chocolate coating, the chewy puffed rice center, the calories...yummy!!
Now, of course, I can't find a protein bar, a granola bar, or a candy bar that my kids can all consume without turning their nose up at it. One of my daughters cannot eat peanuts or almonds or dairy or soy. So what is a mom to do?

In a spirit of full disclosure, this is not a picture of my granola bars, but they look strikingly similar...these bars are not the heavy granola that you might be used to. I purposely made them to resemble a chewy, moist bar like the cheap 90 calorie Quaker Chewy granola bars but with more nutritional content. You can substitute the nuts for a different kind, leave out the coconut, or use regular Rice Krispies if you are not on a gluten free diet. Chia seeds are highly nutritious and are full of calcium, protein and fiber so if you don't want these (they are pretty flavor neutral) I'd try flax seed. If you wanted to add a nut butter of some sort, then you could do that instead of the chocolate chips. I think the key to chewiness is the honey and coconut oil. My kids loved them! I think the oat bars that I make are just too heavy for kids to really enjoy and they feel like they are getting a really yummy treat!
Well I came up with this recipe in which I call them ChocFullOHappiness:
1 whole box of Koala Crisps cereal (rice puff cereal that is cocoa coated, organic, and gluten free)
3 cups of rolled oats
1/2 cup of sesame seeds
1/2 of chia seeds
1/2 cup of finely chopped pecans
1 cup of honey
1 cup of vegan chocolate chips (or regular if you don't have a dairy allergy)
1/2 unsweetened coconut flakes
1/4 cup of coconut oil
In a 350 degree oven, bake the oats and sesame seeds for 20 minutes, stirring once. Then add the coconut and pecans for an additional 5 minutes. (Coconut browns quickly, so be careful). In a large bowl, combine the chia seeds, and cereal. Take the oat mixture and combine that with the cereal mixture. Next, in a small saucepan, heat the honey and coconut oil until it begins to bubble on the sides. Add in the chocolate chips and whisk until smooth. Pour this mixture over the cereal and oat mixture in the large bowl. Stir to coat. Pour this coated mixture onto the cookie sheet that has been sprayed with oil, that was used previously for the oats. Press it together evenly. Let it cool for an hour and then using a serrated knife, gently cut into 12 X 3 strips. This will make 3 dozen granola bars that are chewy, light, and the kids don't even know that they are getting a good carb, fat, and protein with a good dose of fiber thrown in. Chocolate brings us all together!
Friday, August 20, 2010
This week's menu

Monday: We ate takeout from a little vietnamese place down the street that serves gluten free food. This is what happens when we come back from a quick vacation...Pho rocks!
Tuesday: Fresh corn on the cob, watermelon, and one precooked chicken from Fred Meyer
Wednesday: Turkey and wildrice meatloaf with a side of broccoli
Thursday: Chicken stirfry made with Costco veggies with a tamari/honey sauce with lots of white rice and some peaches for dessert.
Friday: it's our night out...who knows what Maddy will make (yes, I make my kids cook once a week!)
As you can see, it's real food for real families minus eggs, dairy, and wheat. It's an adjustment, but we are making it. I mean if you look at how we eat, it's low fat, full of veggies and fruits, lean protein and yes, my kids will eat it all! (we do eat more than rice...this week it just happened be the starch of choice)
Subscribe to:
Posts (Atom)